The Ultimate Guide to Caravan Tyre Pressure

The Ultimate Guide to Caravan Tyre Pressure

The Ultimate Guide to Caravan Tyre Pressure

Don’t know what tyre pressure your caravan should have? Get essential information and advice with this ultimate guide to caravan tyre pressure.

From ensuring the safety of your caravan on the road to optimising performance, it’s important to have the right tyre pressure for your caravan. In this guide, you’ll get all the information you need about choosing and setting the correct tyre pressure for your caravan.
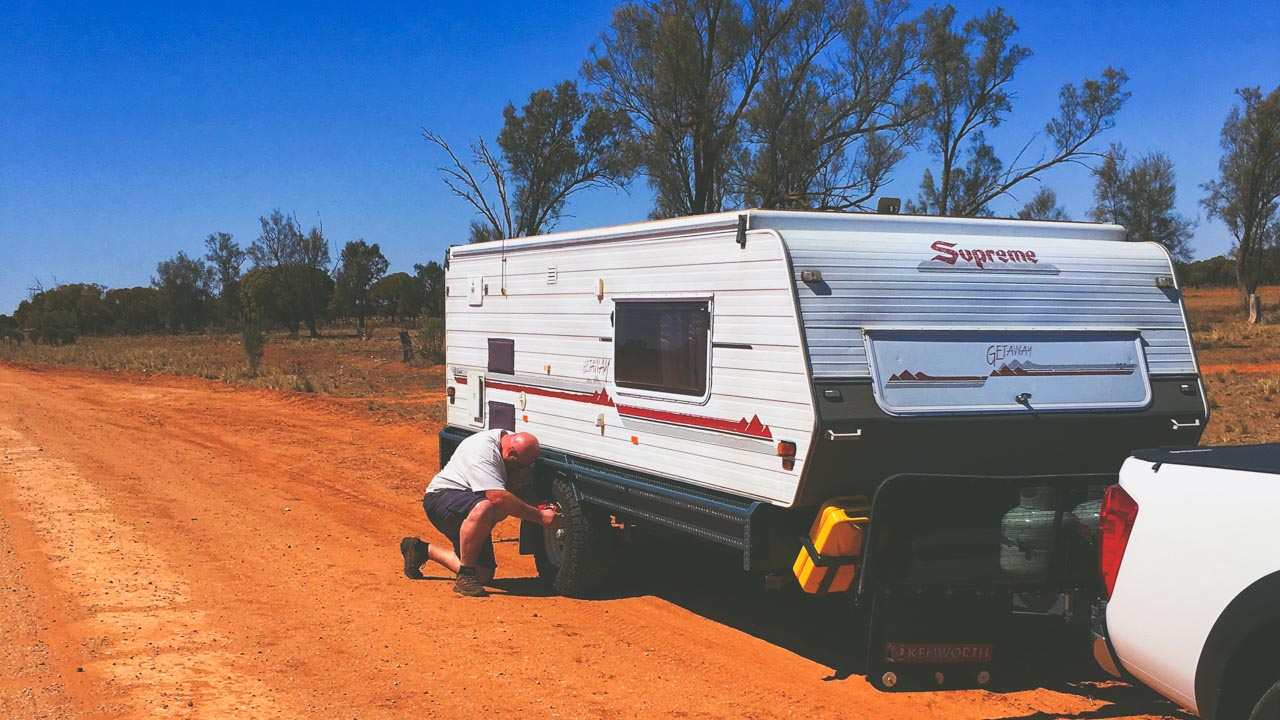
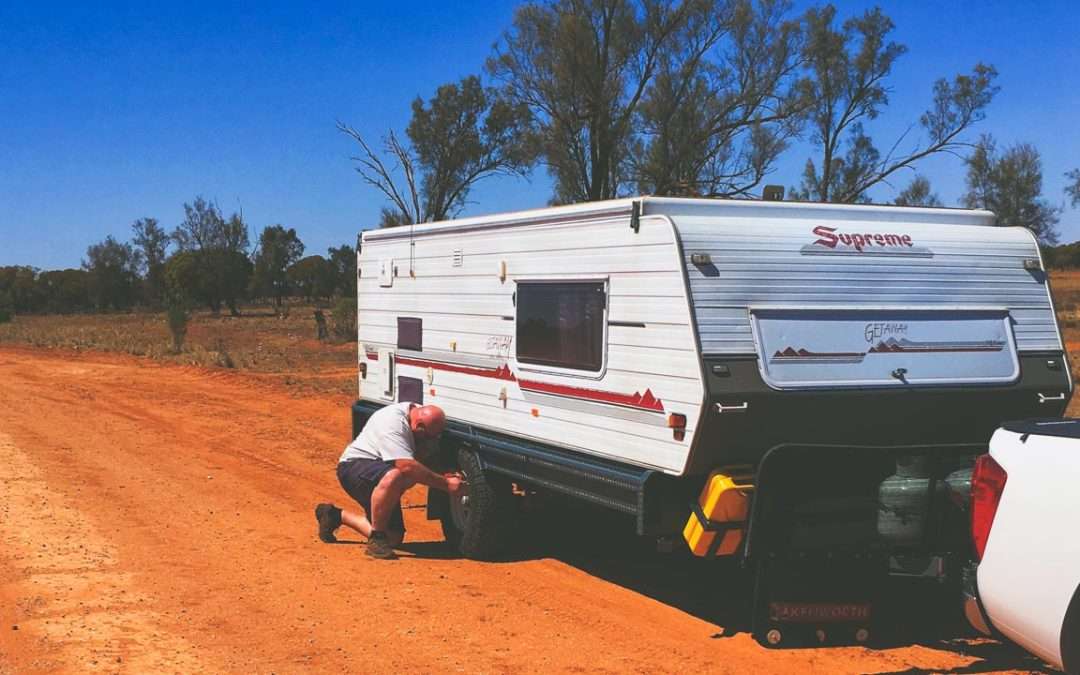
Lowering Caravan Tyre Pressure Before Travelling The Ivanhoe Menindee Road

Lowering Caravan Tyre Pressure Before Travelling The Ivanhoe Menindee Road

What is the Correct Tyre Pressure for a Caravan?

The correct tyre pressure for a caravan will depend on the size of your tyres as well as the load you are hauling. Generally, a good tyre pressure should be slightly higher than the minimum recommended. Check with your tyre manufacturer’s guidelines and adjust accordingly depending on the load and terrain that you are driving through. Ensure that the minimum and maximum limits provided on the sidewall of your tyres are observed; otherwise damage to your tyres may occur.

Use The 4PSI Rule

The 4PSI guideline applies to bitumen road use only. As a general rule the following can be used for road use only.

  • For passenger tyres, inflate your cold tyres to the recommended tyre pressure on your vehicle’s tyre placard.
  • Then, to determine if you have the correct pressure for a given load, you must note the cold pressure reading.
  • Drive for at least 20-30 minutes at normal posted speeds to ensure your tyres have reached operating temperature and then check again. Internal tyre pressure rise is dependent on the cavity of volume of the tyre and the tyres heat build-up.

Ideally, your tyre pressure should be about 4 PSI above the cold pressure. If they are not, adjust the pressure accordingly.

If the pressure is more than 4 PSI above the cold pressure, you should add more air. That is because there is too much friction, which builds up more heat than desirable. Conversely, if they are less than 4 PSI above the cold pressure, the cold pressure is too high and you should release air.

6PSI Rule For Light Truck And 4×4 Tyres

For light truck and 4×4 tyres use 6 PSI as a guide. However rough and corrugated roads cause more flexing and your tyres may rise more than the 4 or 6 PSI guide in which case applying this rule is not recommended.

How Do I Check My Tyre Pressure?

To check your caravan tyre pressure, you’ll need a quality tyre pressure gauge. This should not be confused with the least expensive type of gauge which generally only provide accurate readings up to around 30 PSI. The tyre pressure gauge can be inserted into the valve stem and it will provide an accurate reading after a few seconds. You should always check each tyre individually and adjust the pressures accordingly if needed. Remember to also check your spare tyre separately if you have one fitted.

What are the Benefits of Regularly Checking My Tyre Pressure?

Checking your caravan tyre pressure on a regular basis is beneficial in many ways. Properly inflated tyres enable better vehicle handling, improved fuel efficiency, and safer driving as more of the tyre’s tread comes into contact with the road surface. By keeping your tyres at the correct pressure, you help reduce your chances of damage to both the tyre itself and any other parts of your caravan caused by uneven load distribution due to airflow over an incorrectly inflated tyre.

What Should I do if My Tyres are Under-inflated or Over-inflated?

If you find that your tyres are either under-inflated or over-inflated, you should decrease or increase the air pressure accordingly. This can be done using a tyre pressure gauge and an appropriate pump. If your caravan has vastly different tyre pressures, it is always advisable to start by increasing the pressure on both of these tyres until they reach their optimal inflation level.

What Other Precautions Should I Take When Topping up My Caravan Tyres?

It’s always important to take proper precautions when adjusting the air pressure of your caravan tyres. Before starting, ensure that there are no sharp objects in the area as these can puncture the tyre and allow for a rapid loss of air pressure. When inflating tyres, check that you have a secure connection between the pump and the valve stem and avoid overtightening the valves as this can cause damage to them. Always double-check each tyre after inflation and remember to check that all four tyres have similar pressures!

Tyre Pressure Guide For Different Terrains

Sand 18-26 PSI

A lot depends on the depth and coarseness of the sand. Lower pressure increases the size of your tyre’s footprint increasing its ability to stay on top of the sand instead of digging in. Otherwise known as its flotation characteristics. You also need to have enough momentum to stay on top. Higher pressures will be required when carrying heavy loads. Reduce speed appropriate to the depth and type of sand.

Remember that sand can change and be very different in patches. Sand also builds up heat in your tyres because you are running lower pressures for flotation and because of added friction. Keep a close watch on temperature and if they start to get too high pull over and take a break.

High Speed Smooth Gravel Roads 28-32 PSI

If your tyre pressure is too low on this surface you run the risk of sway and bounce. Higher pressures are generally required when carrying heavy loads. When driving corrugated roads reduce your speed as heat can build up quickly.

Slow Speed Rough Gravel Roads 24-28 PSI

Actual required tyre pressure varies dependant upon on how slow, how rough and with what load. Remember that the higher the speed the more heat generated in the tyre according to your load and the type of road surface being travelled. High temperature in the belts of the tyre is not something you can always feel by hand. Higher pressures are generally required when carrying heavy loads.

Slow Speed Rocky Gravel Roads 20-26 PSI

Ever noticed how easily a balloon pops at higher pressures when it hits something? And when the balloon has low pressure it’s harder to damage or pop? The same thing applies to tyres on rocks in most slow speed situations. Sidewall damage needs to be reduced by careful wheel placement.

Assuming that the going is very slow and possibly in low range and not generating a lot of heat in the tyre. You are looking to improve flexibility over obstacles without damaging the tyre. Very low pressures getting down around 18 psi and below can create a risk of pushing the tyre off the bead of the rim. 20 psi is generally an acceptable minimum low-pressure limit for most sizes. Higher pressures are generally required when carrying heavy loads.

Flexibility at low speed is what you want to achieve. Lowering tyre pressures will increase the size of your tyre’s footprint spreading lengthwise along the tyre.

Understanding Your Caravan Compliance Plate

Understanding Your Caravan Compliance Plate

Understanding Your Caravan Compliance Plate

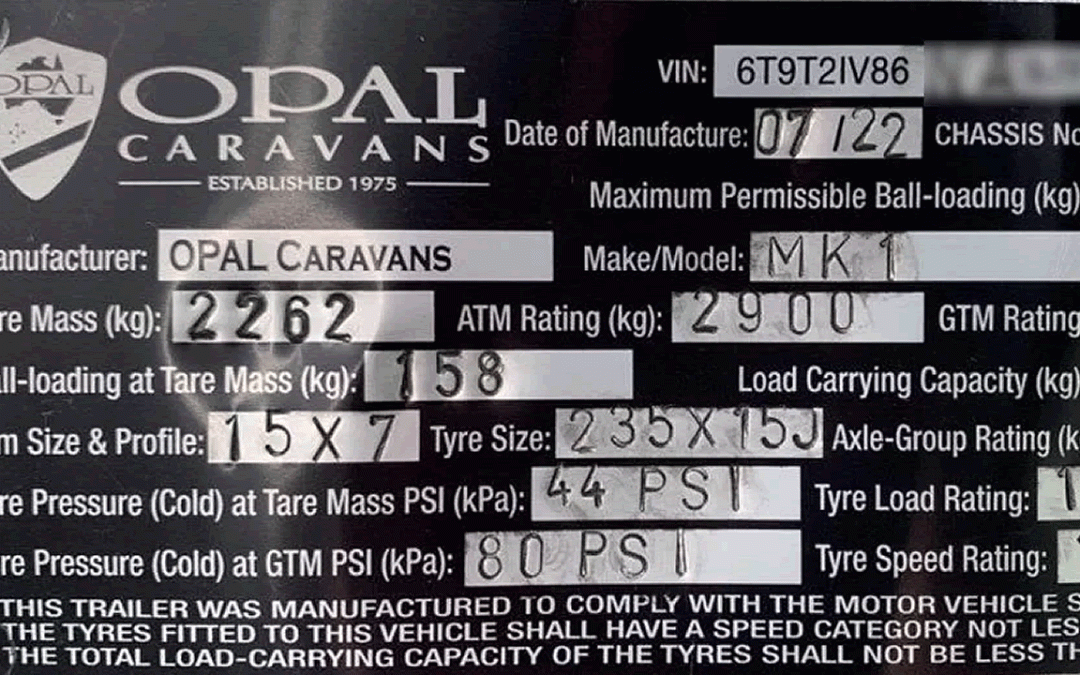
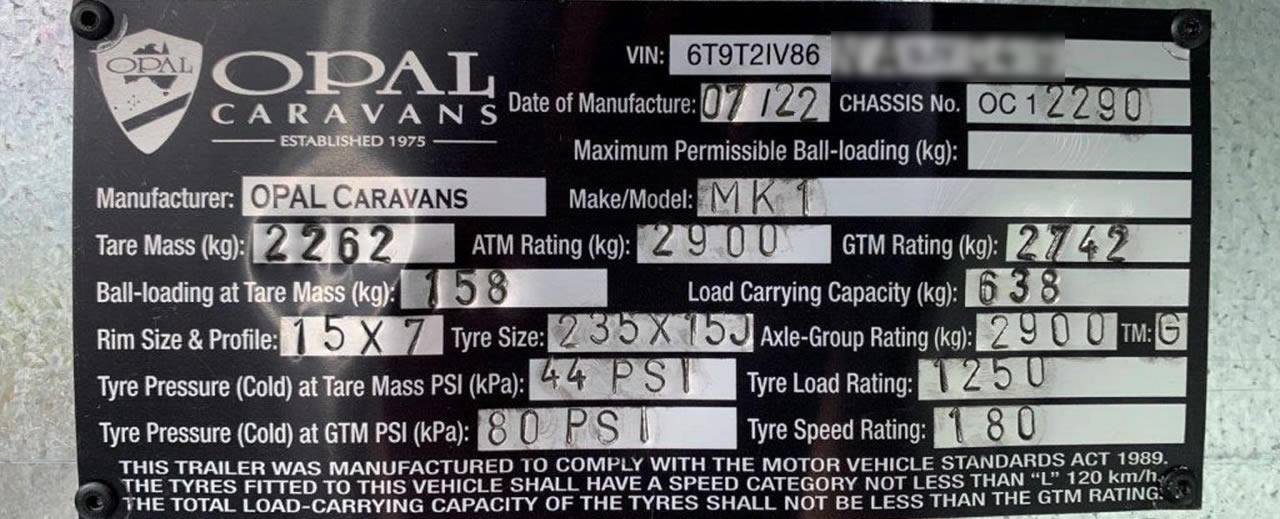
What is a caravan compliance plate and what do the numbers and other things listed on it mean? They all mean something and can often be confusing if you don’t know what you are looking at.

Locating Your Caravan Compliance Plate

The first thing you need to do is find where it is. Common locations are on the drawbar, in the tunnel boot, in the front boot or just inside the entry door. Once you find yours take a photo of it and have a read.

It became law in 1989 for ALL vehicles including home built trailers to have a compliance plate fitted. If your caravan was built before 1989 then chances are it may not have one fitted.

If your caravan doesn’t have a compliance plate fitted and it was built after 1989 the first thing you should do is contact the manufacturer and talk to them. Possibilities are it was overlooked and not fitted or it has been removed by a previous owner. Personally if I was looking to purchase a used caravan and I couldn’t find the compliance plate I would save myself a potential headache move on to looking at something else. Not having a compliance plate fitted will make it difficult to prove that the caravan is the one listed on the registration papers.

Caravan Compliance Plate

Caravan Compliance Plate

Things Commonly Listed On a Caravan Compliance Plate

Manufacturer

The name of the manufacturer of the caravan

Make/Model

The model of the caravan as built by the manufacturer.

VIN Number

This is a unique number belonging to this vehicle used by RMS and/or police to identify the caravan – check registration is current etc. Your caravan insurance company will also want to know the VIN Number. The VIN number will often also be welded on to or etched in to the chassis usually on the drawbar as confirmation.

Date of Manufacture

The date the caravan was made

Tare Mass

The weight of the caravan as manufactured. It doesn’t include extras ordered after manufacture or added to the caravan by the dealership. It won’t include include gas (sometimes even the bottles) or water in your caravans water tanks. A lot of caravans being made by major manufacturers are weighed when manufactured. It doesn’t appear that there is any legal obligation for them to do so as they can calculate it based on build specifications. If a manufacturer hasn’t weighed your caravan when applying the compliance plate then there is a possibility that your caravan may be heavier when empty than you thought. It’s probably a good idea to call in at a public weighbridge on your way home from picking up your caravan and checking it out.

ATM Rating

Maximum allowable weight of the caravan when not hitched to a vehicle

GTM Rating

Maximum allowable weight of the caravan whilst hitched to the tow vehicle. For more information on GTM, ATM read Caravan Weights Explained.

Axle Group Rating

Maximum allowable weight specified by the axle manufacturer. this is often higher than the GTM or ATM Rating (but should never be lower).

Ball Loading at TARE

Ball loading at TARE can be mistaken as a ball weight recommendation however this is not the case. Ball Loading at TARE is meant to be the ball weight of the caravan as manufactured. Taken when empty it is often misleading as the ball weight will change as soon as you load anything in to the caravan.

Maximum Permissible Ball Loading

The maximum allowable weight the tow ball weight can be when the caravan is fully loaded.

Tyres

Instead of asking your question about what is the recommended tyre pressure, size or type for caravan maybe a look at your caravan compliance plate would be a better starting point.

  • Rim Size and Profile
  • Tyre Size
  • Tyre Pressure cold at TARE
  • Tyre Pressure cold at GTM
  • Tyre Speed Rating

If you have any questions about tyre pressures don’t take my recommendation or the internets recommendation. Instead go to your your local tyre dealer.

Chassis Plate

The chassis plate is NOT the caravan compliance plate. Often a caravans chassis will have been built by a third party and they supply caravan chassis to many different caravan manufacturers. The chassis builder will often rate the chassis to a certain weight. This can be more than the GTM or ATM. Under no circumstances does it mean you can legally load your caravan to this weight.

Caravan Weights Explained With Easy Examples

Caravan Weights Explained With Easy Examples

Caravan Weights Explained With Easy Examples

Caravan weights explained. Use the examples below to help you with weighing your vehicles to maximise your safety on the road. It is important to know the various weight criteria of your towing vehicle and caravan in order to stay legal. Your caravan will have its tare mass, maximum aggregate trailer mass (ATM) and maximum gross trailer mass (GTM) on the compliance plate. It is important to weigh your caravan to ensure that you do not exceed these maximum capacities.

Caravan weights Explained – Weighing Your Caravan

Caravan weights explained. Use the examples below to help you with weighing your vehicles to maximise your safety on the road. You can find the location of public weighbridges on the Department of Industry website.

There are also many companies that offer mobile weighing services. When weighing your caravan and tow vehicle it is important to know the level of accuracy of the weighbridge or mobile scales to make ensure your vehicles stay below the maximum carrying capacities. If you aren’t sure read the rest of this article caravan weights explained to find out more.

Tare Mass

Tare Mass is the weight of the caravan with no load. It includes all standard equipment and any options fitted. Think of it as the weight of the caravan when received brand new from the dealer. Tare mass is measured with all fluid reservoirs, if fitted and required for transport, filled to nominal capacity for service, however, non-transport fluid reservoirs such as water tanks and wastewater tanks fitted to caravans are measured empty. After-market optional add-ons (TV, mattresses, extra gas bottles, awnings etc) are not included in the tare mass and are considered as a load, so must be included in your ATM measurement. The tare mass weight of your caravan can be found on the cplate or in the manufacturer’s handbook.

Tare Mass Caravan Weights Explained

Tare Mass (Caravan)

Tow Ball Mass (tow ball download)

Tow ball mass (tow ball download) is the maximum mass allowed to be put on the tow ball of the towing vehicle. You can find the tow ball mass capacity in your coupling manufacturer’s handbook. To measure the tow ball mass you can use a ball weight scale. You must not exceed the tow ball mass capacity.

Tow Ball Download Caravan Weights Explained

Tow Ball Mass

Aggregate Trailer Mass (ATM)

Aggregate Trailer Mass (ATM) is the total mass of the trailer when carrying the maximum load recommended by the manufacturer. The ATM is generally measured with the caravan unhitched from your towing vehicle and resting on its jockey wheel. The maximum ATM of your caravan can be found on the vehicle plate or in the manufacturer’s handbook and must not be exceeded. To measure your ATM, weigh your loaded caravan resting on its jockey wheel, including full water tank, gas tanks and everything you would pack to go travelling. Ensure that your measured mass does not exceed your specified ATM capacity.

ATM Aggregate Trailer Mass Caravan Weights Explained

ATM Aggregate Trailer Mass

Gross Trailer Mass (GTM)

Gross Trailer Mass (GTM) is the maximum mass recommeded by the manufacturer of your fully loaded caravan when it is hitched to your tow vehicle. The GTM of the caravan is transmitted to the ground by only the caravan tyres and excludes the mass distributed to the towing vehicle through the coupling. The GTM of your caravan can be found on the vehicle plate or in the manufacturer’s handbook and must not be exceeded. To measure your GTM, weigh your loaded caravan when it is attached to your towing vehicle, and make sure your measured mass does not exceed your specified GTM capacity.

GTM Gross Trailer Mass Caravan Weights Explained

GTM Gross Trailer Mass

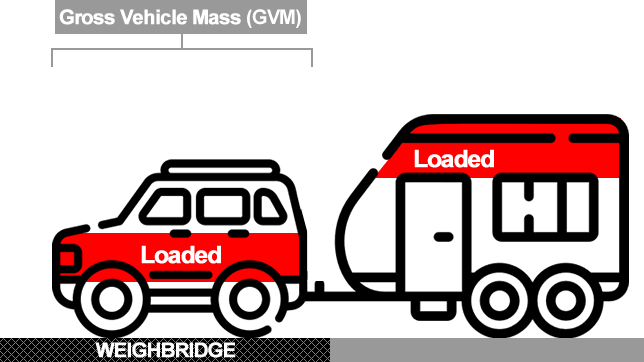
Gross Vehicle Mass (GVM)

Gross Vehicle Mass (GVM) is the maximum total mass of a fully loaded motor vehicle as specified by the vehicle manufacturer. For some passenger vehicles, it might be known as the Maximum Loaded Vehicle Mass (MLVM). To measure your loaded vehicle mass, weigh your fully packed towing vehicle, including passengers, with the caravan hitched and ensure it is less than your vehicle’s maximum GVM or MLVM.

GVM Gross Vehicle Mass Caravan Weights Explained

GVM Gross Vehicle Mass

Gross Combination Mass (GCM)

Gross Combination Mass (GCM) is the maximum mass set by your tow vehicle’s manufacturer and refers to the maximum combined mass of your loaded tow vehicle and your loaded caravan hitched together. Not all vehicles are provided with a GCM, but if it is, your vehicle manufacturer’s guide will provide you with the GCM of your tow vehicle. To measure the GCM, weigh your fully loaded towing vehicle hitched to your fully loaded caravan. Legally, you must not exceed the specified GCM capacity of your vehicle if a GCM is specified.

GCM Gross Combined Mass Caravan Weights Explained

GCM Gross Combined Mass

Where To Fill Caravan Water Tanks

Where To Fill Caravan Water Tanks

Where To Fill Caravan Water Tanks

Where to fill caravan water tanks is a very common question when free camping. Here we outline 15 different options as well as give some tips on how to get it done as well as some of the etiquette issues in play when you need to fill caravan water tanks.

Transferring Water From Jerry Can To Caravan Water Tank

Transferring Water From Jerry Can To Caravan Water Tank

Where To Get Water From When Free Camping

  1. Fill At Home
  2. Use WikiCamps To Find Potable Water
  3. Visitor Information Centres
  4. Caravan Parks
  5. Petrol Stations
  6. Parks
  7. Water Filling Stations
  8. Showgrounds
  9. Free & Low Cost Camps
  10. Creeks & Rivers
  11. Rainwater
  12. Cemeteries
  13. Council Depots
  14. Public Toilets
  15. At A Friend Or Family Members House

1. Fill At Home

It sounds pretty obvious but we always fill our tanks at home before heading off. Depending upon where we are going we might fill up a few jerry cans to take with us.

2. Use WikiCamps To Find Potable Water

Your absolute best guide to finding where to fill caravan water tanks is WikiCamps. Go into filters and turn off all of the options except for “Water Facilities” and apply. Then just search the area you are located in.

WikiCamps Where To Fill Caravan Water Tanks

WikiCamps Where To Fill Caravan Water Tanks

3. Visitor Information Centres

Visitor Information Centres usually have drinking water taps available for filling up caravan and camper trailer water tanks. Or use them to fill your jerry cans. Go inside and ask a staff member if you can’t see a sign saying “Drinking Water”. Don’t be tempted to fill up your water tanks from the tap at a dump point if the information centre has one as it might not be as clean as you would like it to be.

4. Caravan Parks

We don’t stay in caravan parks very often however we will often book into one so we can fill our water tanks and jerry cans with potable water. It’s also a good opportunity to catch up on a few loads of washing. Caravan parks will also have a dump point available so we get that chore knocked over and out of the way while in the park.

5. Petrol Stations

There is usually a potable drinking water tap at petrol stations. Often there is one out of the way where the air for pumping up your tyres is. Always ask the service station attendant before hooking up your water hose and filling your tanks – it’s the right thing to do. We only ever fill up at a petrol station if we have bought fuel. We’ve never been refused water at a petrol station. Of course make sure you won’t be in the way of anyone pulling in to fuel up.

6. Parks

Local parks are a good location to fill your water tanks. Sometimes the tap handle has been removed by the council as they don’t want people taking water. Be respectful of the locals. If you desperately need water and it’s the only place you can find it ask at the local Information Centre, call the local council or check with a local business first. You might need a four way tap key to turn the tap on.

7. Water Filling Stations

Some towns have water available for travellers in the form of coin operated water stations. Places that we have accessed water from a filling station are Coober Pedy in SA and Young, Molong and Murrumburrah in NSW. These all show up on the WikiCamps app. To get them to show in WikiCamps turn go into filters and turn off everything except “Water Facilities” and turn on “Cost”. It’s always a good idea to have a stash of coins available to use.

Water Filling Station At Young NSW

Water Filling Station At Young NSW

8. Showgrounds

Potable water is usually available at Showgrounds but it’s not always free. Use your WikiCamps App to see if they have an available water tap and if you need to camp there and pay a fee to fill up.

9. Free & Low Cost Camps

Lots of Free and Low Cost Camps have water taps on site available for you to use. If it’s a donation camp even if you aren’t staying throw some money in after filling up. It’s the right thing to do and you know it.

10. Creeks & Rivers

Creeks and rivers won’t give you potable water suitable for drinking, however it will generally be suitable for showering, washing your dishes or washing your clothes. Using it for these purposes will help conserve your onboard drinking water.

Have a look to see how clean the water is and make sure it’s fresh running water. You wouldn’t want to shower in water that has been sitting stagnant. Don’t take water from waterways in drought affected areas where water is hard to come by. What little water is there could be the only thing keeping the ecosystem alive.

We’d never put creek water into our drinking water tanks. Some people will have setups where they have one or two tanks for drinking water and another one for creek water. A simple way to keep some separation is to carry a jerry can just for creek water.

A tip for showering is to use a 12v shower pump and some creek water heated over a fire. Use a shower tent or if really remote you can just let it all hang out and go “au naturale”.

11. Rainwater

If it rains then put your annexe out and angle one corner so that you can collect the runoff in a bucket. There are even kits made to redirect the runoff directly into your tanks.

12. Cemeteries

Cemeteries can be a good location to fill your water tanks. Sometimes the tap handle has been removed by the council as they don’t want people taking water. Be respectful of the locals. If you desperately need water and it’s the only place you can find it ask at the local Information Centre, call the local council or check with a local business first. You might need a four way tap key to turn the tap on.

13. Council Depots

Council Depots can be a good location to fill your water tanks. Sometimes the tap handle has been removed by the council as they don’t want people taking water. Be respectful of the locals. If you desperately need water and it’s the only place you can find it ask at the local Information Centre, call the local council or check with a local business first. You might need a four way tap key to turn the tap on. Many water filling stations as mentioned previously are to be found at the local council depot.

14. Public Toilets

Public Toilets can be a good location to fill your water tanks. Sometimes the tap handle has been removed by the council as they don’t want people taking water. Be respectful of the locals. If you desperately need water and it’s the only place you can find it ask at the local Information Centre, call the local council or check with a local business first. You might need a four way tap key to turn the tap on.

15. At A Friend Or Family Members House

Don’t forget that your good old Aunty Ruby who lives in Morphett Vale has a perfectly good tap in her front yard! Call in for a cup of tea and a chat and top up those tanks while you’re at it.

Tips For Getting Water In To Your Caravan Water Tanks

Use an Inline Water Filter

Filter your water as it goes into your tanks. Generally town water throughout Australia is good drinkable water. However you just don’t know when and if something will end up in your tanks that will make you as crook as Rookwood and leave you blowing chunks by the following morning. An inline water filter will do the trick. You can get them cheaply off eBay. Attach it to your hose as you’re filling your tanks or jerry cans. The water goes through the filter before entering your tanks.

Inline Water Filter

Inline Water Filter

Carry Spare Hose & Tap Fittings

You should carry spare hose and tap fittings while travelling in a range of types and sizes. A roll of thread tape and some spare rubber fitting washers also can come in handy. Most taps don’t have a connection on them (they would if people didn’t knock them off) so bring your own (and don’t forget to take it with you).

Get A 4way Tap Key

It’s handy to carry a Tap Key. You can get them from Bunnings for about $20. They’re made of brass and have four different sizes to suit different tap spindles.

Often a public tap won’t have the handle on it. It’s most likely been taken off by the council to avoid vandalism. Having this key will enable you to get access to water at parks and sports grounds. Be careful to not steal water. It is good to have in case of emergency.

Extra Water Storage

  • Jerry Can
  • Water Bladder
  • 10L Water Containers
  • Collapsible Water Containers

You can only fit so much water in your caravan or camper trailer water tanks. Having extra water storage available allows you to increase your water storage capacity. It also provides a way to transport water from a water source to your caravan or camper trailer when they are already set up. Say you have a great spot by the lake and you need to fill up your tanks. If you hook your caravan up and take it in to town by the time you get back your primo spot will probably have been taken by someone else.

Water Restrictions

We live in a land often plagued by drought. Be very mindful that some towns in Australia are in severe drought. They can be struggling provide water to local residents so the last thing they need on top is travellers coming into town and filling up. If you know in advance that you be in a drought affected area fill up your tanks before you get there. Towns with currently with water restrictions will most likely have signage as you drive in to let you know.

How To Get Water From Containers In To Your Caravan Water Tanks

An easy way to transfer water from jerries in to your tank is with a 12v shower pump. We’ve used this method for many years – easier than standing there and holding the jerry as it glugs in slowly. The pump fits inside the big mouth ProQuip cans. For older small capped jerries we just upend it into a water drum and chuck the pump in. We’ve always used the long corded 12v shower pumps (they never last long) but our new one is rechargeable (usb) – have been using it heaps and we get about 200 litres between charges.

Kickass Shower Pump To Transfer Water To Caravan Water Tank

Kickass Shower Pump To Transfer Water To Caravan Water Tank

How To Add A Caravan Tool Box For Additional Storage

How To Add A Caravan Tool Box For Additional Storage

How To Add A Caravan Tool Box For Additional Storage

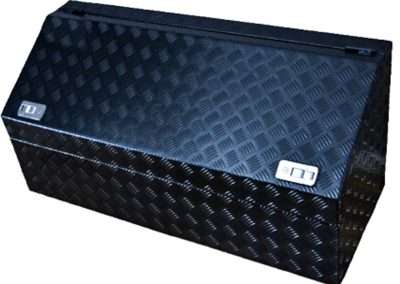
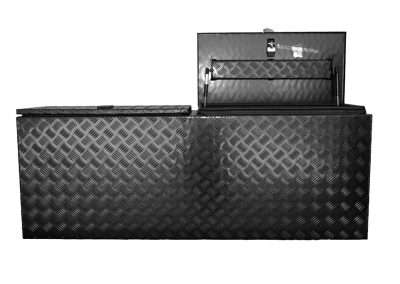
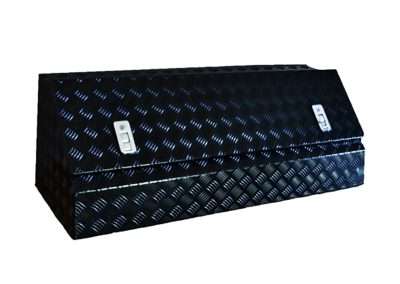
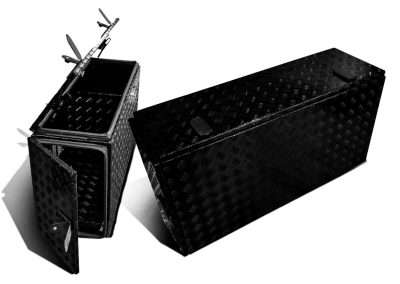
A large range of caravan tool box designs include drawbar storage for items like generators, BBQs, fridges, gas bottles, batteries and much more. It doesn’t matter if you have purchased a new or preloved caravan. Most caravans just don’t have enough storage space.

You never have enough storage space for all the things you want to take. And weirdly the larger the caravan you have the more stuff you take. It seems like you are always looking for additional room. A caravan tool box can also provide extra space for your tools, poles, ropes, hoses, mats etc. Accessories such as jerry can holders for fuel or water, underbody battery boxes and internal gas bottle rings.

Drawbar Toolbox Jayco All Terrain

Drawbar Toolbox Jayco All Terrain

Common materials that a caravan tool box can be manufactured from are aluminium checkerplate, aluminium flat sheet, steel checker plate and flat sheet steel. Aluminium would be the most popular choice due to it’s weight saving over steel. Caravan tool boxes are often powder coated to match your van’s external colours.

There is an off the shelf caravan tool box available to suit most caravan brands and models. Bailey Australia Caravans, Billabong Caravans, Crusader Caravans, Gold Stream Caravans, Jayco Caravans, JB Caravans, Majestic Caravans, Millard Caravans, New Age Caravans and many dozens more.

Caravan Tool Box Draw Bar Storage

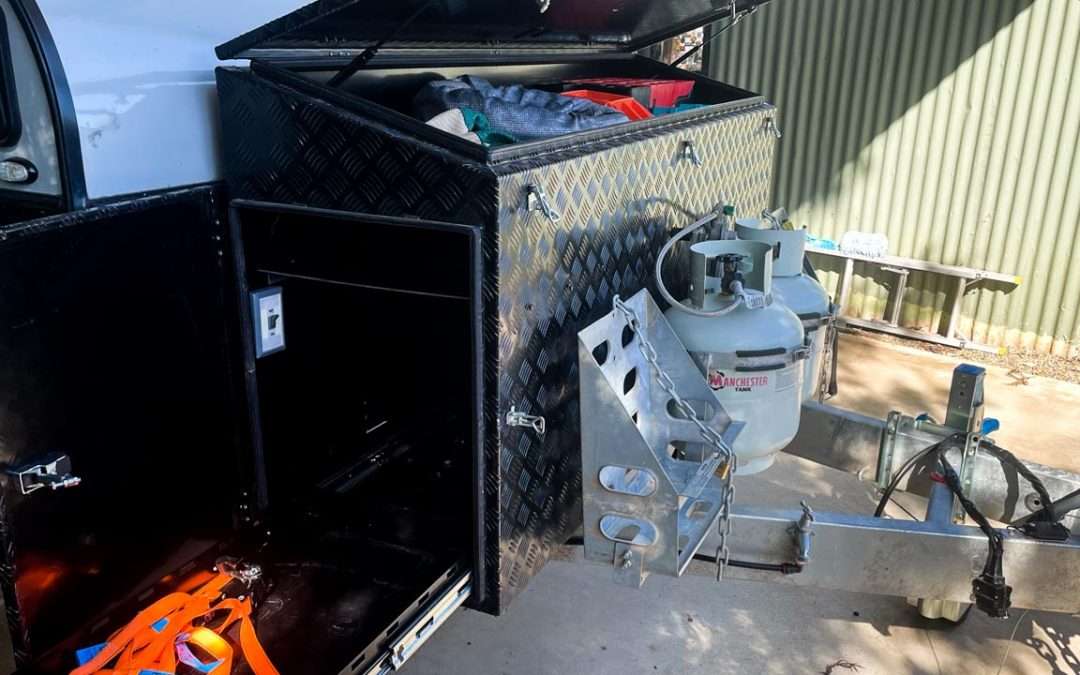
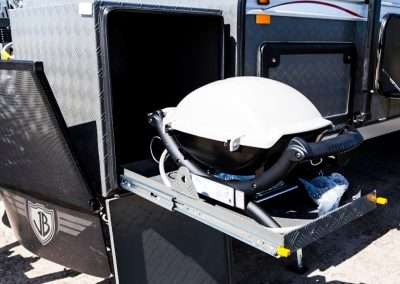
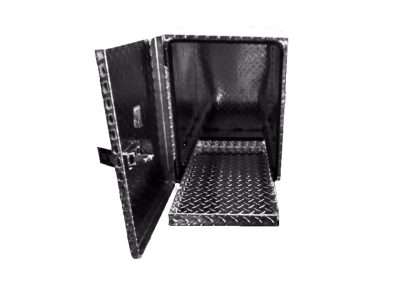
A popular position to mount your caravan tool box is on your draw bar. There is a massive range of caravan draw bar storage boxes available for this application. A massive selection of configurations to suit caravans, pop-tops, hybrids, and camper trailers is available. They can incorporate top lids, side doors, slides and more. Opt to move your gas bottles to inside the box, or retain on the outside. If you are moving your gas bottles on your caravan make sure to consult with a licenced gas fitter. Moving gas bottles on your caravan will usually require a new gas certificate to be issued depending on which state you are from. A drawbar mounted caravan tool box is great for BBQs, generators, fridges, mats, steps, annexes, levelling blocks, chocks, hoses, water hoses and pipes.

Caravan Tool Box Supreme Getaway Drawbar

Caravan Tool Box Supreme Getaway Drawbar

Caravan Tool Box For Generators

A lot of caravanners want to run a caravan air conditioner while off grid with no access to 240v power. This creates a need need to take a generator. A common addition to many caravans is a bumper mounted caravan generator storage box. These boxes allow you to both store and run your generator from the box. Add in a fully integrated lift up lid and a slide allowing easy mounting and removal of your generator. Include a weatherproof door seal gasket and you will have no need to physically move your generator in and out of your caravan. Just run your normal caravan power cord from the generator to the power inlet and away you go.

Caravan Tool Box Example Custom Rear Storage Setup

If you’ve got to have it exactly your way many manufacturers can build it to suit. Below is an example of what can be included in a custom caravan tool box set up for mounting to your rear bumper.

  • Upgrading of bumper strength – rear bumper gusseted and reinforced.
  • Extended rear bumper framing to support larger boxes.
  • BBQ storage on passenger side.
  • Generator storage on slide out on driver’s side.
  • New combination tail lights on rear.
  • Licence plate and light relocated to rear of box.
  • Rear boxes matched to spare tyre depth to remain within overhang limits.
  • Height raised to retain rear departure angle clearance (so the box doesn’t drag when exiting driveways etc).

What Does An Average Caravan Tool Box Cost?

A basic caravan toolbox price range is from $440 to $550 for simple boxes up to well over $2000 for a large caravan toolbox with slides, multiple doors and custom fabrication work.

Should I Worry About Waterproof & Durability?

You certainly should. Look for tool boxes for caravans that come with a rubber seal and that are fully seam welded to make them weather and dust resistant. Aluminium itself is an excellent material to make toolboxes due to its durability and lightweight property.

Where Can I Buy A Caravan Tool Box

There are many manufacturers and importers of caravan storage boxes in Australia. Below is a list of some I have found.

Adding A Generator Box For Rear Of Caravan

A generator box is an essential accessory for any caravan owner who wishes to have a reliable and secure power source on the go. Installing a generator box at the rear of your caravan offers numerous benefits, including protection, convenience, and enhanced storage. In this blog post, we’ll explore why a generator box is a worthwhile investment, the key considerations when choosing one, and some tips for installation and maintenance.

Benefits of a Generator Box For Rear Of Caravan

  1. Protection
    Weatherproofing: A generator box protects your generator from rain, dust, and other environmental elements, ensuring it remains in good working condition.
    Security: It provides a secure space to store your generator, reducing the risk of theft and damage.
  2. Convenience
    Easy Access: Having a dedicated box at the rear of the caravan means you can easily access your generator whenever needed.
    Quick Setup: A well-designed box allows for quick and hassle free setup and connection, so you can start using your generator without delays.
  3. Space Optimisation
    Efficient Storage: By storing the generator outside the main living area, you free up valuable interior space for other essentials.
    Balanced Weight Distribution: Properly placing the generator at the rear can help maintain balanced weight distribution, which is crucial for safe and stable travel.

Key Considerations When Choosing a Generator Box For Rear Of Caravan

  1. Size and Compatibility
    Generator Size: Ensure the box is large enough to accommodate your generator. Measure your generator’s dimensions and compare them with the box’s internal measurements.
    – Caravan Fit: Check that the box is compatible with your caravan model and can be securely mounted at the rear.
  2. Material and Durability
    Construction: Look for boxes made from high-quality materials such as aluminium or galvanized steel for durability and corrosion resistance.
    Weatherproofing: Choose a box with weatherproof seals to protect your generator from the elements.
  3. Ventilation and Safety
    Airflow: Adequate ventilation is crucial to prevent overheating. Ensure the generator box for rear of caravan has sufficient ventilation openings or fans to maintain proper airflow.
    Locking Mechanism: A reliable locking mechanism enhances security, protecting your generator from theft.
  4. Ease of Installation
    Mounting Kit: Opt for a generator box that comes with a comprehensive mounting kit and clear installation instructions.
    Professional Installation: If you’re not confident in installing the box yourself, consider seeking professional assistance to ensure a secure and stable setup.

Tips For Installation And Maintenance

1. Installation Tips
Follow Instructions: Always follow the manufacturer’s installation instructions carefully to ensure a secure and stable setup.
Professional Help: If you’re unsure about the installation process, consider hiring a professional to do it for you.

2. Maintenance Tips
Regular Checks: Periodically check the generator box for rear of caravan and generator for any signs of wear or damage. Ensure all screws and bolts are tight.
Cleanliness: Keep the box clean and free of debris to maintain proper ventilation and prevent damage.

A generator box for the rear of your caravan is a smart investment that provides protection, convenience, and efficient storage. By considering factors such as size, material, ventilation, and ease of installation, you can choose the right box for your needs. Proper installation and regular maintenance will ensure your generator remains in good condition, ready to provide power whenever you need it.

Adding a generator box for rear of a caravan your caravan setup not only enhances your travel experience but also ensures you have a reliable power source for all your adventures. Make sure to invest in a high quality box that meets your needs and enjoy the benefits it brings to your caravan lifestyle.

Caravan Rear Bar Storage To Maximise Space

Caravan travel is all about maximising space and convenience. One of the most effective ways to optimise storage in your caravan is by utilising the rear bar. Rear bar storage solutions provide additional space for carrying essential items, ensuring a clutter-free and organised interior. In this blog post, we will explore the benefits of rear bar storage, the types of storage options available, and tips for choosing and installing the best storage solution for your caravan.

Benefits of Rear Bar Storage

  1. Increased Storage Capacity
    Extra Space: Caravan rear bar storage allows you to carry more items without sacrificing interior space.
    Clutter Reduction: Storing items externally helps keep the inside of your caravan neat and organised.
  2. Enhanced Safety and Stability
    Weight Distribution: Properly loaded rear bar storage can help balance the weight distribution of your caravan, improving stability and handling.
    Secured Items: Rear bar storage solutions are designed to securely hold your items, preventing them from moving around while you’re on the road.
  3. Easy Access
    Convenient Loading: Items stored on the rear bar are easily accessible, making loading and unloading quick and efficient.
    Tool Free Access: Many rear bar storage solutions are designed for tool-free access, saving time and effort.

Types of Caravan Rear Bar Storage Options

  1. Storage Boxes
    Lockable Boxes: These provide secure storage for valuable items, protecting them from theft and weather conditions.
    Weatherproofing: Look for storage boxes with weatherproof seals to protect your belongings from rain, dust, and other environmental elements.
  2. Bike Racks
    Family Trips: Ideal for families who enjoy cycling, bike racks can securely hold multiple bikes.
    Space Saving: By storing bikes on the rear bar, you free up space inside the caravan for other essentials.
  3. Jerry Can Holders
    Extra Fuel: Essential for long trips, jerry can holders allow you to carry additional fuel safely.
    Water Storage: Can also be used to carry extra water, crucial for off-grid camping.
  4. Spare Wheel Carriers
    Quick Access: Having a spare wheel easily accessible on the rear bar ensures you can quickly change a tire if needed.
    Safety: Ensures that the spare wheel is securely fastened and protected from the elements.

Tips for Choosing Rear Bar Storage

  1. Assess Your Needs
    Trip Duration: Consider the length of your trips and the type of items you need to store.
    Activities: Think about the activities you enjoy and what equipment you need to carry, such as bikes, kayaks, or extra fuel.
  2. Quality and Durability
    Material: Choose caravan rear bar storage solutions made from high-quality, durable materials like aluminium or galvanised steel.
    Weather Resistance: Ensure the storage options are weatherproof to protect your belongings.
  3. Ease of Installation
    DIY Friendly: Look for storage solutions that come with clear installation instructions and require minimal tools.
    Professional Help: If you’re unsure about the installation process, consider seeking professional assistance.
  4. Security Features
    Lockable Options: Choose caravan rear bar storage boxes and racks with reliable locking mechanisms to secure your belongings.
    Anti Theft Measures: Consider additional security features like padlocks or integrated locks.

Utilising caravan rear bar storage on your caravan is a practical way to maximise space, enhance safety, and improve convenience during your travels. By selecting the right storage options based on your needs and preferences, you can ensure a more organised and enjoyable caravan experience. Whether you need to store extra fuel, carry bikes, or simply add more storage capacity, rear bar storage solutions offer a versatile and efficient way to optimise your caravan’s space.

Investing in high-quality, durable rear bar storage not only enhances your travel experience but also ensures that your belongings are safe, secure, and easily accessible. With the right storage solution, you can focus on enjoying your adventures without worrying about space constraints or clutter.

Caravan Tool Box Types

List Of Australian Caravan Brands

Adventura Caravans, Alpha Fibreglass, Aussie Wide Caravans, Avan Campers, Ballina Campervans, Billabong Custom Caravans, Caravan Manufacturer, Caria Caravan Trailer, Challenge Camper Trailers Caravans, Classic RTM Caravans, Concept Caravans, Coromal Caravans, Creative Caravans, Davsher Caravans, Desert Edge Trailers, Designer Vans Caravans, Discoverer Campers, Dreamhaven Caravans, Dreamland Trailers, Driftaway Caravans, Dryden Trailers Caravans, Eagle Caravans, Elross Caravans, Evernew Caravans, Exodus Campers, Ezytrail Campers, Galaxy Caravans, Goldstream Recreational Vehicles, Golf Caravans, Heaslip Campers, Horizon Motorhomes, I & D Industries, Imperial Caravans, Jayco Caravans, Jurgens Caravans, Kea Campers Australia Caravans, Kingdom Caravans, La Vista Caravans, Lifestyle Leisure RV, Limit Seeker Camper Trailers Caravans, Lotus Caravans, Majestic Caravans, MARS Campers, May West Caravans, Millard RV Caravans, Montana Caravans, Nova Caravans, Olympic Caravans, Opalite Caravans, Paradise Caravans, Paradise Motor Homes, Paramount Caravans, Regal Caravans, Regent Caravans, Retreat Caravans, Rhinomax, Rivenlee Caravans, Roma Caravans, Royal Flair Caravans, Spaceland Industries Caravans, Spinifex Caravans, Suncamper Caravans, Sunland Caravans, Sunliner Recreational Vehicles, Supreme Caravans, Swagman Aust Caravans, Tavlor Motorhomes, Toy Haulers Manufacturer, Track Trailer, Trailblazers RV Caravans, Trailer Manufacturer, Trailstar Caravans, Trakka Caravans, Trakmaster Caravans, Travelhome, Traveller Caravans, Truelux 5th Wheel, Vanguard Caravans, Western Caravans, Windsor Caravans, Winnebago Industries, Wirraway Motorhomes, Zone RV

Caravan Tunnel Boot Slide Out Drawer

Caravan Tunnel Boot Slide Out Drawer

Caravan Tunnel Boot Slide Out Drawer

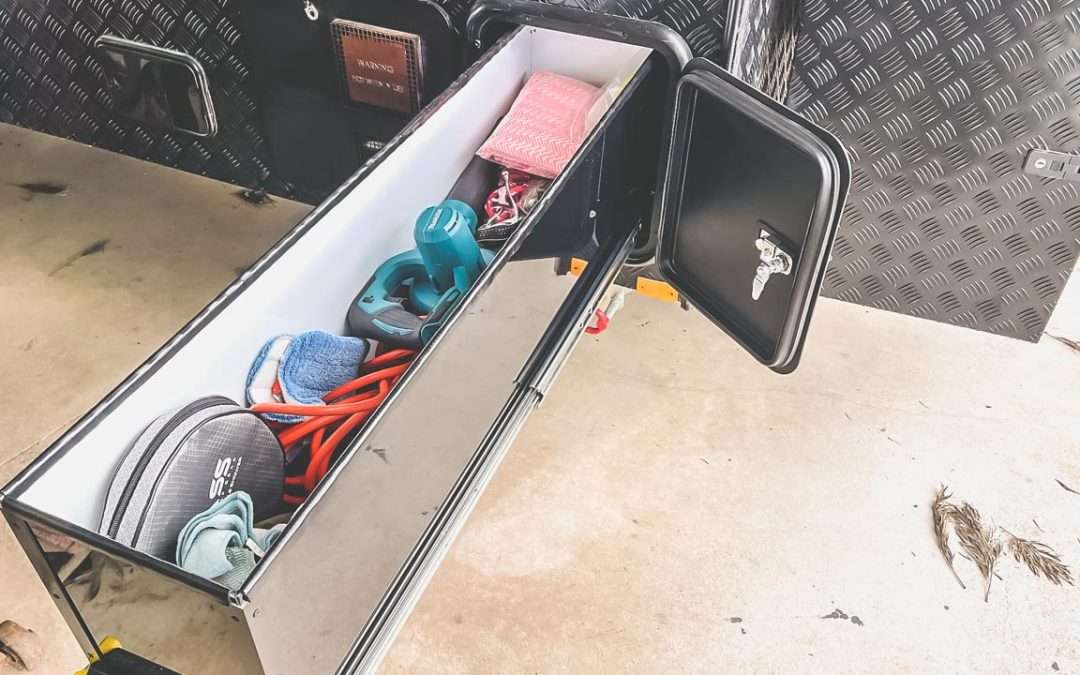
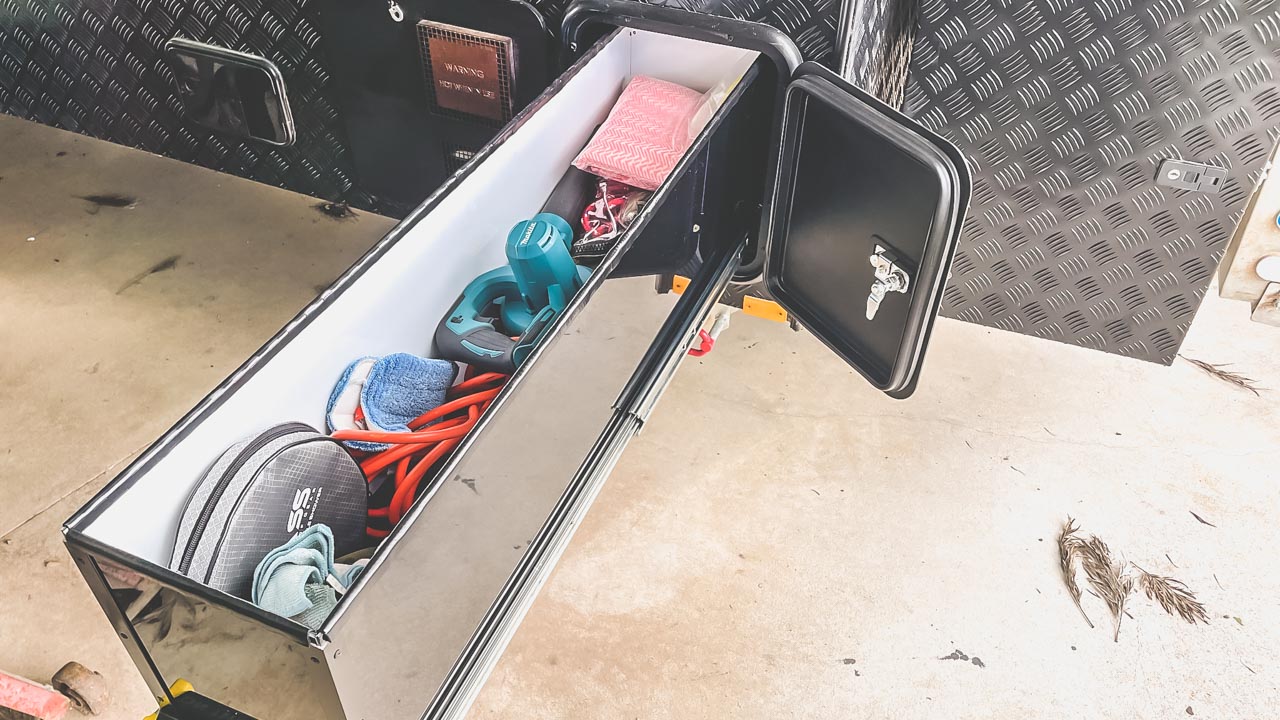
We turned our narrow caravan tunnel boot in to a caravan tunnel boot slide out drawer by installing a slide and building our own lightweight sides. Our Jayco All Terrain caravan came with a narrow storage tunnel on the passenger side that had a lot of room inside. However it was almost impossible to organise and get to things inside.

Storage space is always a highly desirable item in a caravan and usable space is even better. We ordered a caravan boot slide out from OnTheGoRV. The one I ordered was the DS265 Tunnel Boot Slide. It fits a tunnel boot with an internal opening width of 280mm. They also make slides to suit wider openings. Additionally as we liked the slide out idea we also bought one of their DS570 Tunnel Boot Slides to make a caravan BBQ slide out with a storage box on the other side of the caravan.

Caravan Tunnel Boot Slide Out Drawer Storage Box

Caravan Tunnel Boot Slide Out Drawer Storage Box

DS265 Caravan Slide Out Specifications

Aussie made using premium quality 3mm mill finish aluminium. Beautifully finished in a modern satin black powder coat. 125kg load rated with LOCKABLE tracks ensure your Caravan Tunnel Boot Slide Out glides easily.

  • Overall Width: 265mm
  • Closed Length: 1050mm
  • Open Length: 1990mm
  • Height: 80mm
  • Tray Size: 1015mm x 220mm
  • Weight: 10kg
  • Weight Capacity: 125kg
  • Colour: Satin Black
  • Material: 3mm Aluminium
  • Lockable Draw Slide: Yes

Installing The Tunnel Boot Slide

Jayco had mounted the caravan jack inside the door on the left. As we have a 5 ton bottle jack in the ute already we removed the Jayco fitted jack as it wasn’t required. No point carrying around two or three kilograms that you don’t need (that reminds me I need to get back on my diet!) The jack was held in place with four screws.

I found it easier to remove the slides runners to give me access to the mounting holes on the sides. Before removing the deck and runners I measured the distance between the slides and cut some pieces of composite panel offcuts to work as templates/spacers. I drilled pilot holes in the tunnel boot floor and mounted the sides using the provided tec screws. Altogether there are fourteen screws – seven screws each side. Therefore more than enough to secure the weight of the slide and anything you mount to it.

Caravan Boot Slide Out Drawer

OnTheGoRV make storage box sides to turn your caravan tunnel boot slide out in to a drawer but it was a bit expensive so I made my own out of composite panel. The bonus with making my own was that I could make it to the absolute maximum size that would fit the caravan tunnel boot slide. We now have heaps of storage for our bits and pieces

Making The Sides For The Tunnel Boot Slide Out Using Composite Panel

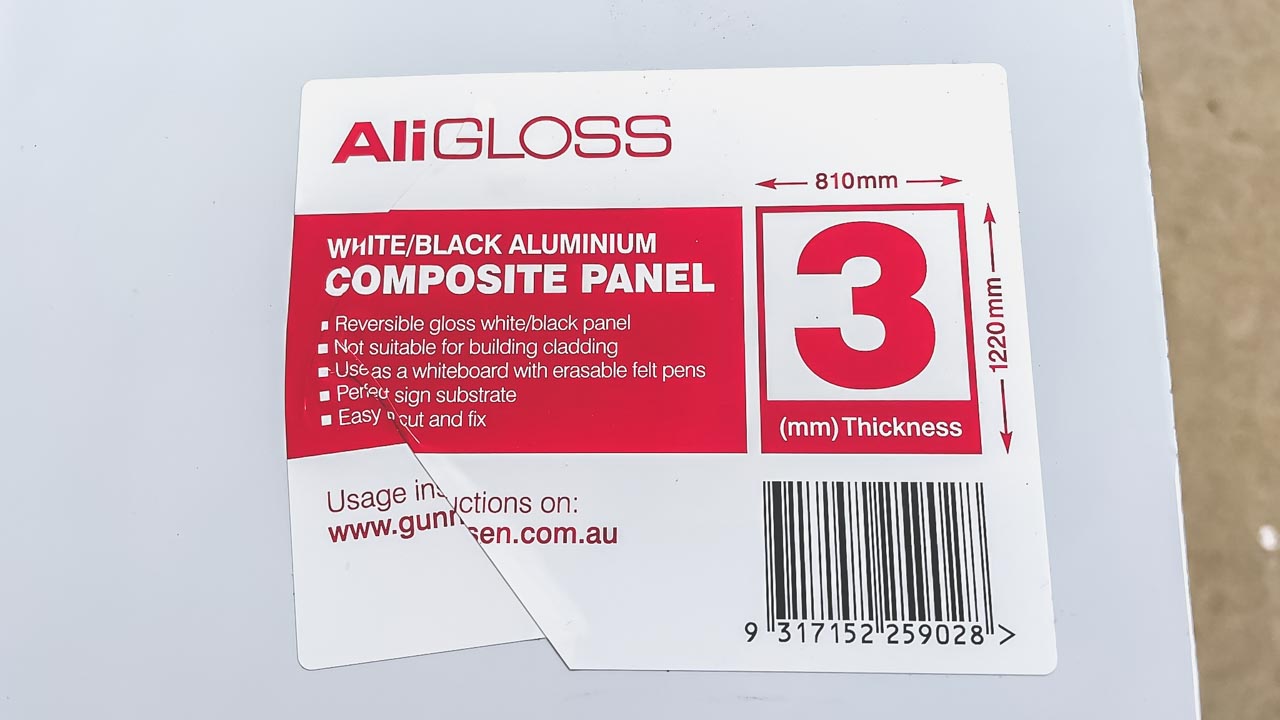
Composite panel. You can get it at Bunnings. Good luck finding where though! we’ve been using it for years and have bought it from three or four different Bunnings and it’s never ever where the phone app says it is.

Composite Panel Sign Board

Composite Panel Sign Board

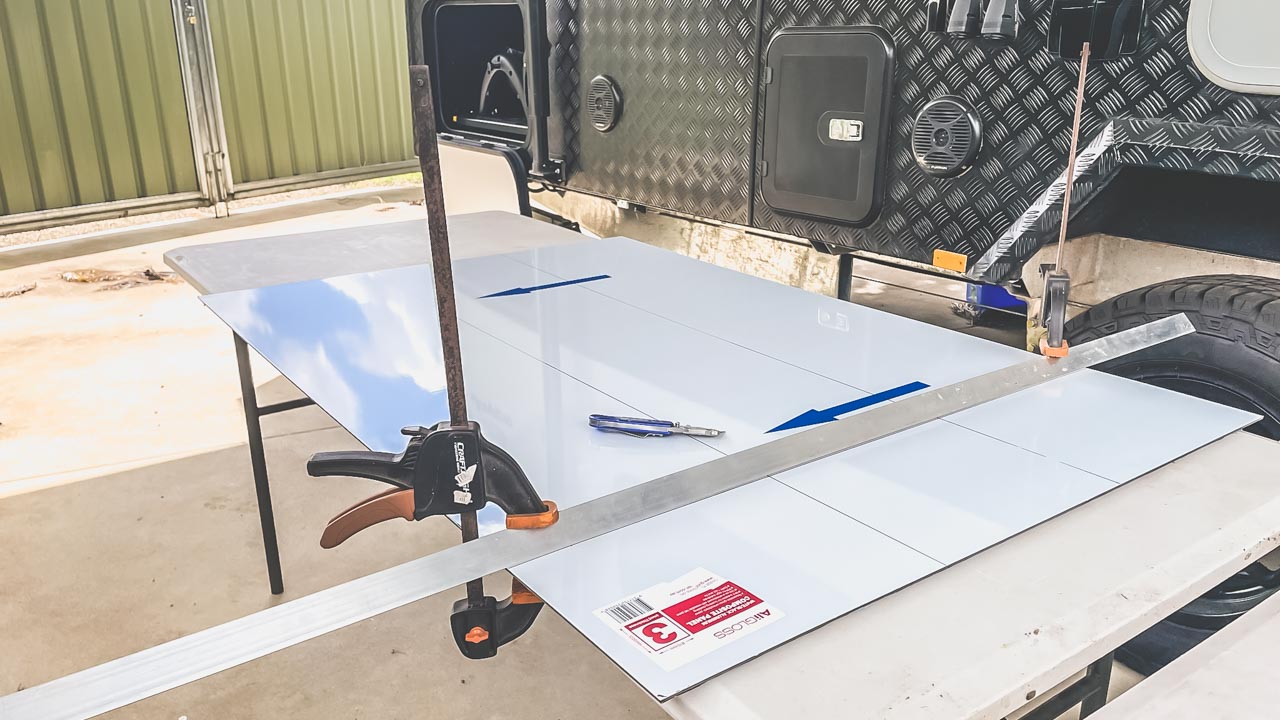
Cutting the composite panel for the sides. It’s easily cut with a Stanley knife – you just need a nice straightedge to run the knife along.

How To Cut Composite Panel

How To Cut Composite Panel

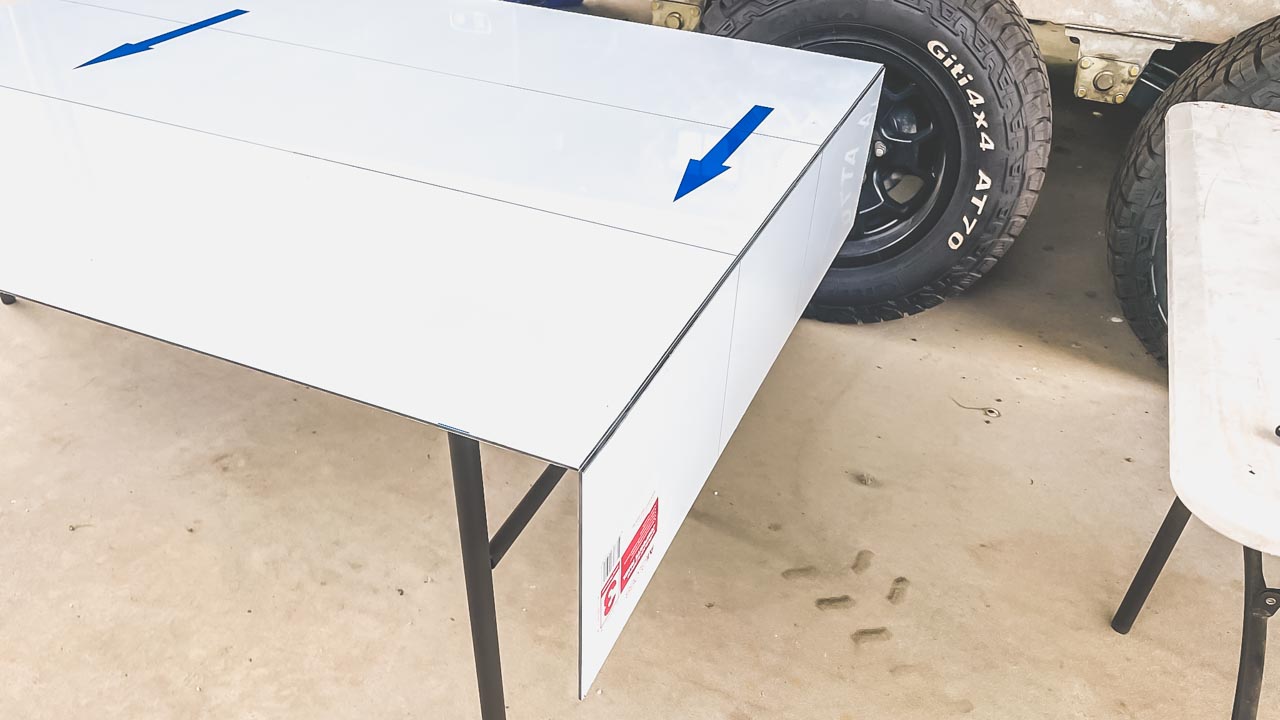
After half a dozen passes with the knife you just snap it over the edge of a table. Fold it back on itself a few times then cut the remaining plastic along the join. The stuff is gloss white on one side and gloss black on the other. It has a white plastic protective film covering when it.

Snap For A Nice Clean Edge

Snap For A Nice Clean Edge

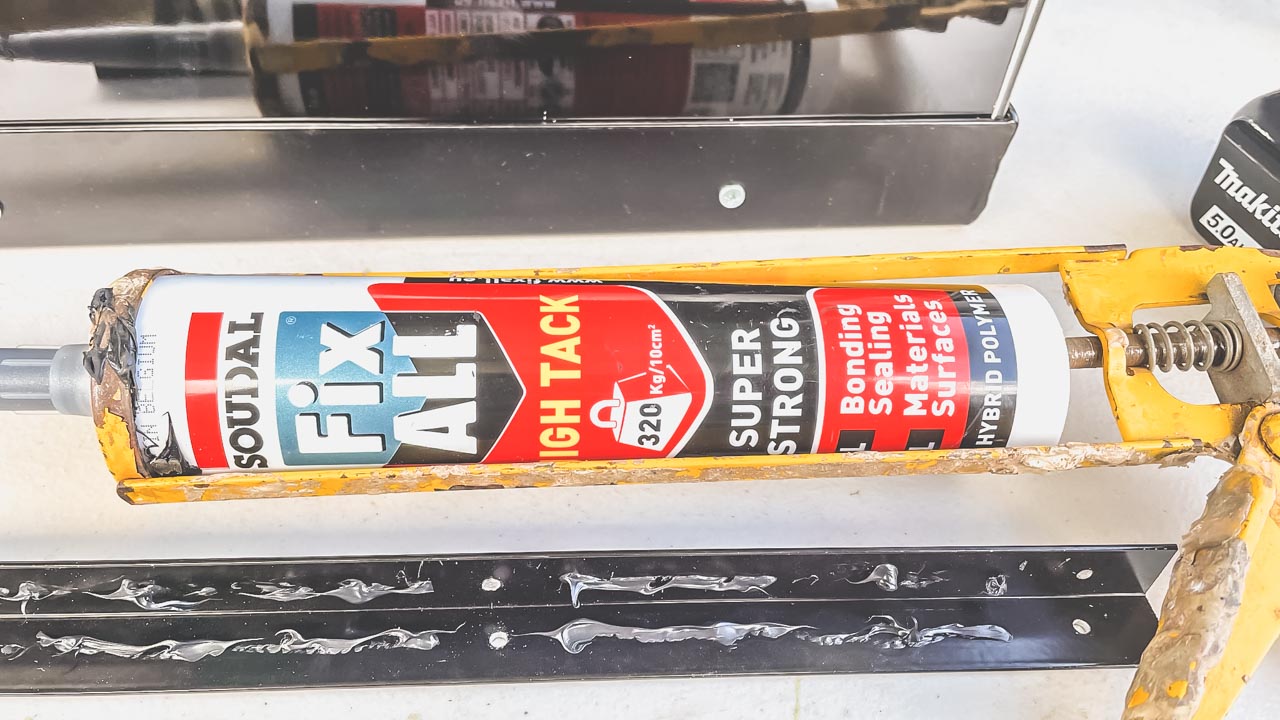
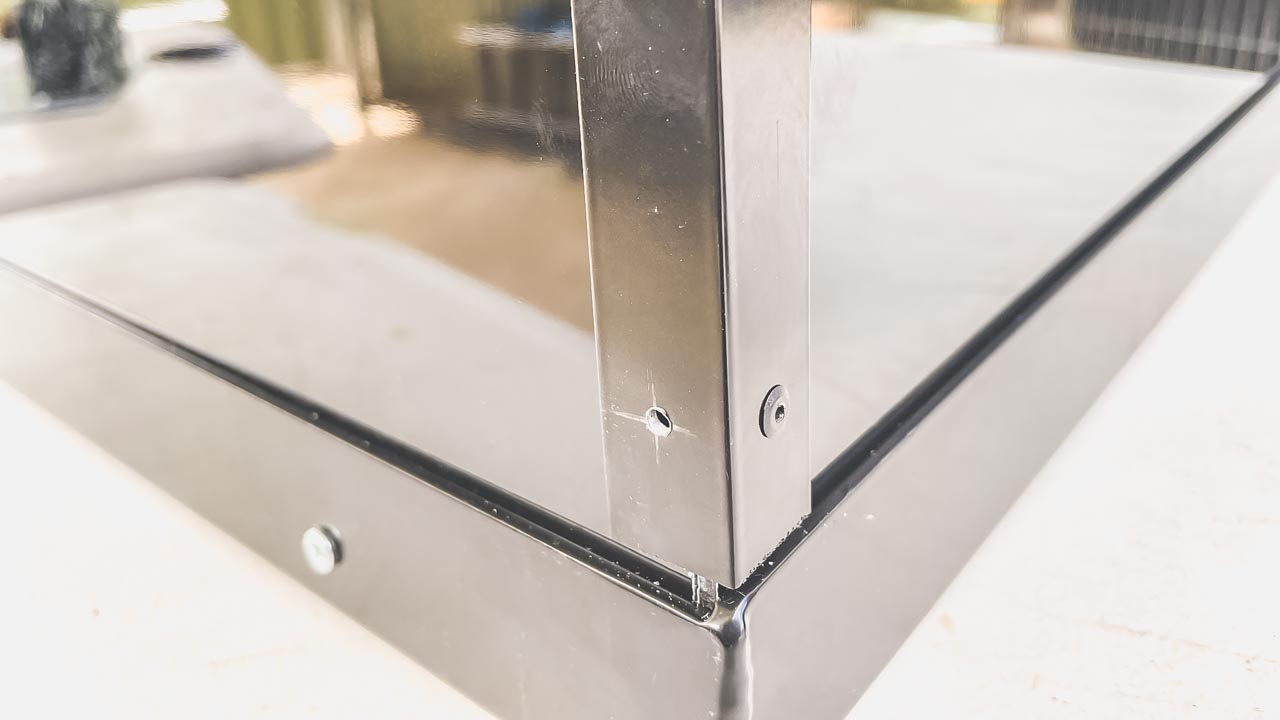
Corners of the box is held together with powdercoated black angle aluminium and glue. This Soudal stuff sticks and holds really well.

This Soudal Stuff Sticks And Hold Really Well

This Soudal Stuff Sticks And Holds Really Well

The rivets are really just there to hold the angle until the glue goes off.

Powdercoated Aluminium Angle From Bunnings For A Neat Finish

Powdercoated Aluminium Angle From Bunnings For A Neat Finish

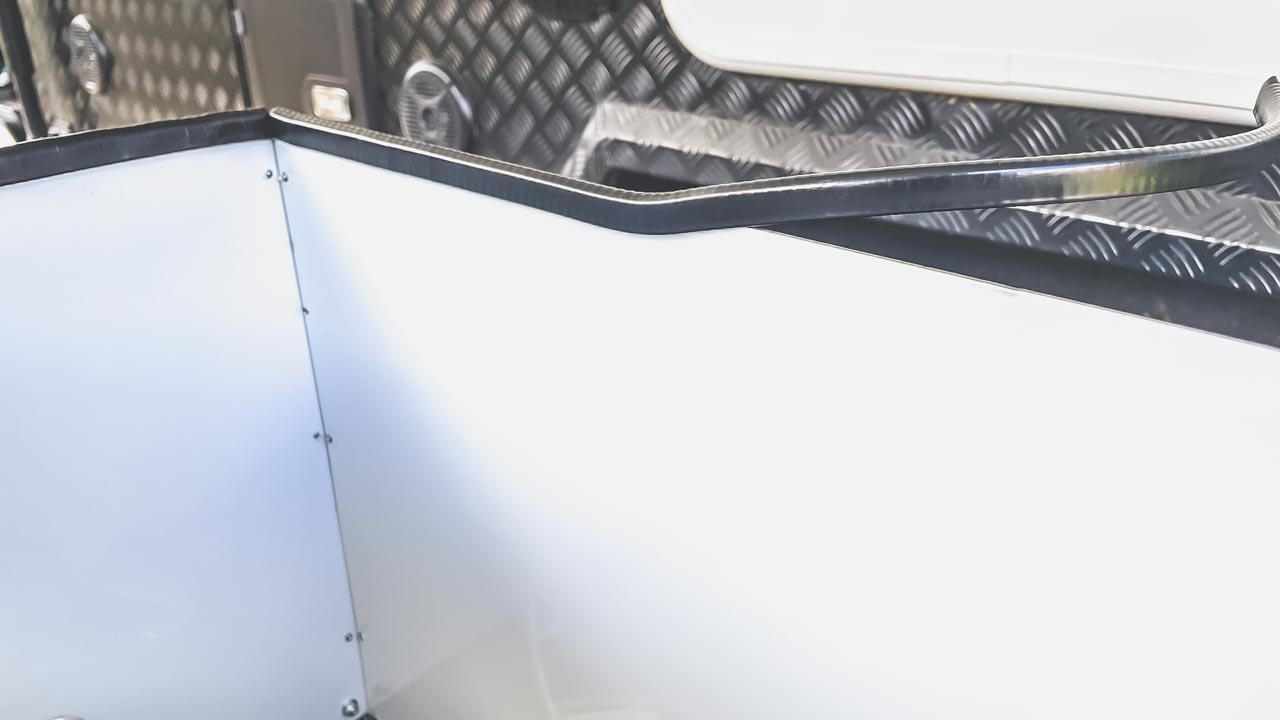
I installed pinch weld on the edges to neaten things up and cover any potential sharp edges. I got rid of the sharp edges anyway just using a bit of emery paper wrapped around a sanding block.

Pinch Weld On The Edges To Neaten Things Up And Cover Any Potential Sharp Edges

Are We Happy With The Caravan Tunnel Boot Slide Out Drawer?

We’re very happy with the way it all turned out. Installing the caravan tunnel boot slide drawer has made the small tunnel boot very usable. As it was originally you could only access what was inside the boot at the front. If you wanted anything towards the back you pretty much had to unpack the whole thing to get to it. Now you just open the door and slide it out. Much better.

Caravan Tunnel Boot Slide Out Drawer Storage Box

Caravan Tunnel Boot Slide Out Drawer Storage Box